Monday, November 30, 2015
Project 10: Push a Button and Turn On LED
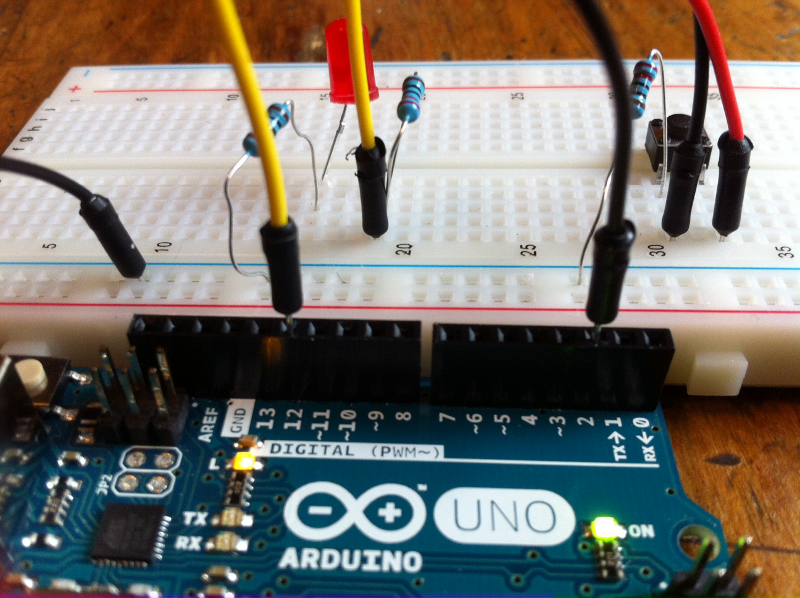
For this project, we will push a button and turn on the LED. In the picture below, there are multiple wires and resistors. There's also a button you will click for the light to blink or turn on. There are 6 wires and 3 resistors involved and happens to be able to connect to each other. As we get to more tutorials, it will get harder.
Wednesday, November 25, 2015
Project 9: Controlling LED with Potentiometer
 In this project, we learn to read analog voltages from the arduino by using the potentiometer. It happens to be an adjustable resistor which consists of a wiper that slide across a resistive strip to deliver an increase or decrease in resistance. To make the LED blink, there are certain steps to follow so it can work. There are pictures in the document to help set up the potentiometer. As you can see in the pictures below, you have the potentiometer and the arduino with the wires set up.
Tuesday, November 24, 2015
Project 7: Counting in Binary
For this project, we used the binary concept to make the LED lights blink. The coding part of this project was completely changed from the last couple of projects we worked on. We learned a whole lesson on how binary numbers work. First, it was complicated until I got the hang of it. When we were trying to make them blink, it was very confusing since the lights didn't blink the way it should.

Project 6: Programming Three LEDs
In this project, we added another LED light to make it blink. The LED light is supposed to be blue but we used clear instead. For the coding, it was difficult at first but it came all together with some assistance. In the picture below, the red light is on then it switch to the clear light for a second. This project is the same as the last project just with another light added to the breadboard.


Monday, November 23, 2015
Project 5: Programming Two LEDs

 For this project, we programmed two LED lights to on and off after each other. There were four parts to lighting up the LED lights. In the picture to the right is showing the green LED light on while the red light is off. In the picture to the left is showing the red LED light on while the green light is off. There were couple more additions to completing this project. For Part A, we had to make the red light blink twice while the green light blink once. For Part B, we had to have both lights blink 2 seconds each back to back. For Part C, we had to have the green light blink 3 times while the red light blinks once. This was very simple if understand the directions.
Wednesday, November 18, 2015
Project 4: Programming the LED


For this project, we turned on and off the light. We changed a couple parts of the code so the light would be able to turn on and off either staying on or staying off. So we replaced 13 with the color red so the Arduino would know that its turning on the LED light. There were 4 different parts to this project: turn on the light without it turning off, turn the light off without it turning it on, turn it on for 15 seconds and off for 3 seconds, and turn it on for 1 second and off for 1 second. The first one is pretty easy since you have to delete a part of the code which is the turn off part of the code. The second is the same way of the first one but the opposite. The third one has the light on longer than having it off the longest. The last one has the LED light blinking on and off for a second each.
Tuesday, November 17, 2015
Project 3: Keep a Light On

Monday, November 16, 2015
Project 2: Modify Blink

Project 1: Blink a Light
Subscribe to:
Comments (Atom)